 |
| "Pucker up" swag/banner on lemonade drink stand for a wedding drinks' table |
Items needed for banner/swag:
Silhouette Chipboard
Jute or ribbon
Hot glue gun
Silhouette Double-sided adhesive (optional)
Glitter (optional) (we have a variety of colors)
First, select a font that fits your wedding theme/style (classic, vintage, modern, etc.). Apply the chipboard sheet to your cutting mat, and follow the instructions carefully. Cut chipboard letters. Yay. (I like this stuff.) Note: my blade was getting pretty dull, so it did not want to cut all the way through. I later went over the lines with an Xacto knife. This was only because my silhouette blade was already on its last hurrah and I had not yet received my new one. Follow the pre-set guides for cutting depth and speed, and test on a small section first. If it doesn't cut just right, try adjusting it to a higher blade depth. Unless your blade is very dull, as was mine, you shouldn't have any problems at all.
Second, stretch out a long piece of jute (etc.), about 2-3 feet longer than you want your swag/banner length to be--one extra foot for each side, to be used for tying it up later. Our tables were 6 feet long, thus I rolled out a piece of jute about 8-9 feet long on the floor. I kept it taut for when I'd be gluing the letters to it by securing it with heavy books on either end. Once your letters are cut, lay them out on the floor on top of the jute at the spacing you desire. Use hot glue or another securing method to secure the letters to the jute or ribbon.

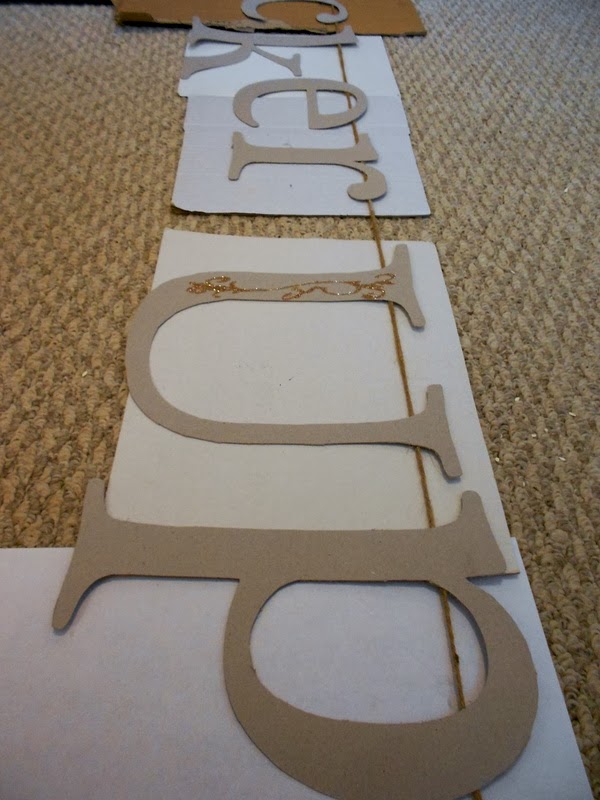 |
| Secure chipboard letters to jute using a hot glue gun. |
 |
| Apply a glitter flourish using Silhouette double-sided adhesive |

And just a few more fun ideas...
* Hang chalkboard vinyl signs from each drink container labeling what's inside.
 |
| Hang chalkboard vinyl signs to label each container |
 |
| Make Chalkboard vinyl signs to label drink containers. |
* Use paper drinking straws; put them in old mason jars and wrap some jute or twine a few times around the top before tying it off. Simple. Cute. Simply cute.

* Melt chopped crayons into shaped silicone baking dishes (in this instance, a heart shaped one) and wrap and give as party favors. You can buy your own chosen colored crayons in bulk online. Use Silhouette Studio to design your "Thank you" note, then print and cut using your printer and Silhouette!
 |
| Melted crayon hearts, made using a heart shaped silicone candy making dish |
* Use an old board, some stencil vinyl, and paint to create a lasting momento of "the big day." Apply the stencil to the board (made using the stencil vinyl) and paint over, leaving behind the date. :)
 |
| Wedding date painted on board using stencil vinyl |
And that's it! Drink some lemonade and drink up. :)

No comments:
Post a Comment