So...travel much? If you answered yes, you know that most everyone in the world has luggage that basically looks like this:

Rectangle. Black. And almost exactly the same. And, if you are like me and have such nondescript luggage, you likely also resemble me when I'm at baggage claim at the airport, lifting up lots of luggage as it comes around the turn-stile, not quite sure if it is mine. "Does mine have handle like that or not?" "I don't remeeemmmber a pocket there, but maybe it's just because it's upside down?" And then I wonder, again, why I didn't tie something to it to help me identify it easier, or why I didn't duct tape a giant "X" across the front and back with neon colored tape. ;) Which is why something like the following would be useful:

I made these handy-dandy little things just using my Silhouette as gifts for my nieces to put on their backpacks and one for my roomie who is just about to go on a trip (to Russia!). The butterfly and cat are my nieces' respective favorite animals, and the "S" was meant to be reminiscent of the OSU emblem for my roommate Sarah who is getting ready to leave her work at OSU and move across the country to start med school. Way to be, Sarah! Each was simple to make with just some scrap fabrics, and each would be easy to tie to some luggage, a child's backpack, or to use as a personalized key-chain.
Obviously, such thing won't help you spot your luggage or bag as easily as, say, buying bright orange and yellow stripped luggage might, but it's an easy (and cheaper) alternative. ;) Plus, they're just kind of fun to have. Here's how to make them using your Silhouette:
Materials needed:
*Fabric scraps (large enough for the various pieces--the size you desire. My two smaller ones were each about 2 1/2 inches by 3 1/2 inches, so obviously only need scraps, especially for the lettering.)
* Ribbon
* Key ring (optional)

First, select the image or shape that you'd like your tag to be. As I said earlier, I made the two smaller into the shapes of my nieces respective favorite "animals": a cat and a butterfly. :)
Hint: An easy thing to do is to just find an image offline, save it, open it in Silhouette studio, and then use the "trace" function and select the option to just trace just the outer edge.

I have found that searching for "cartoon" images gives me the basic type of outline that I'll want for projects such as these. (I.E. Cartoon cat, or cartoon butterfly.) Once you have your outlines/chosen shapes, size them to your desired width and height, and pick your fabrics.

 |
| Once you've ironed on this interfacing, remove the paper backing to expose smooth side of interfacing. |
 |
| Using the grid in Silhouette Studio helps you know where to position your fabric, etc. on your mat. |

Now, for the "trickier" part, which really isn't that tricky at all.
As you'll notice, the back of your cut images will now have the clear part of the interfacing exposed, which is what was exposed once you took off the paper backing after having ironed on the front, rough side to the back of your fabric. This smooth side is meant for you to iron that back side onto another fabric (or cardstock, etc.), and is a heat adhesive. (You can kind of see it in the picture of me peeling back the paper off the fabric a few picture back.)
Now, I had some felt and fleece that I wanted to use up, but seeing as how I now know that they can clog up your blade casing pretty quickly, and because I was feeling too lazy to want to clean it out, I decided to iron my pieces onto the fleece, and then to cut out around it by hand, rather than also cutting a mirror image of my designs out also using the Silhouette. This would serve as my back piece, and also give the interfacing something to adhere to.
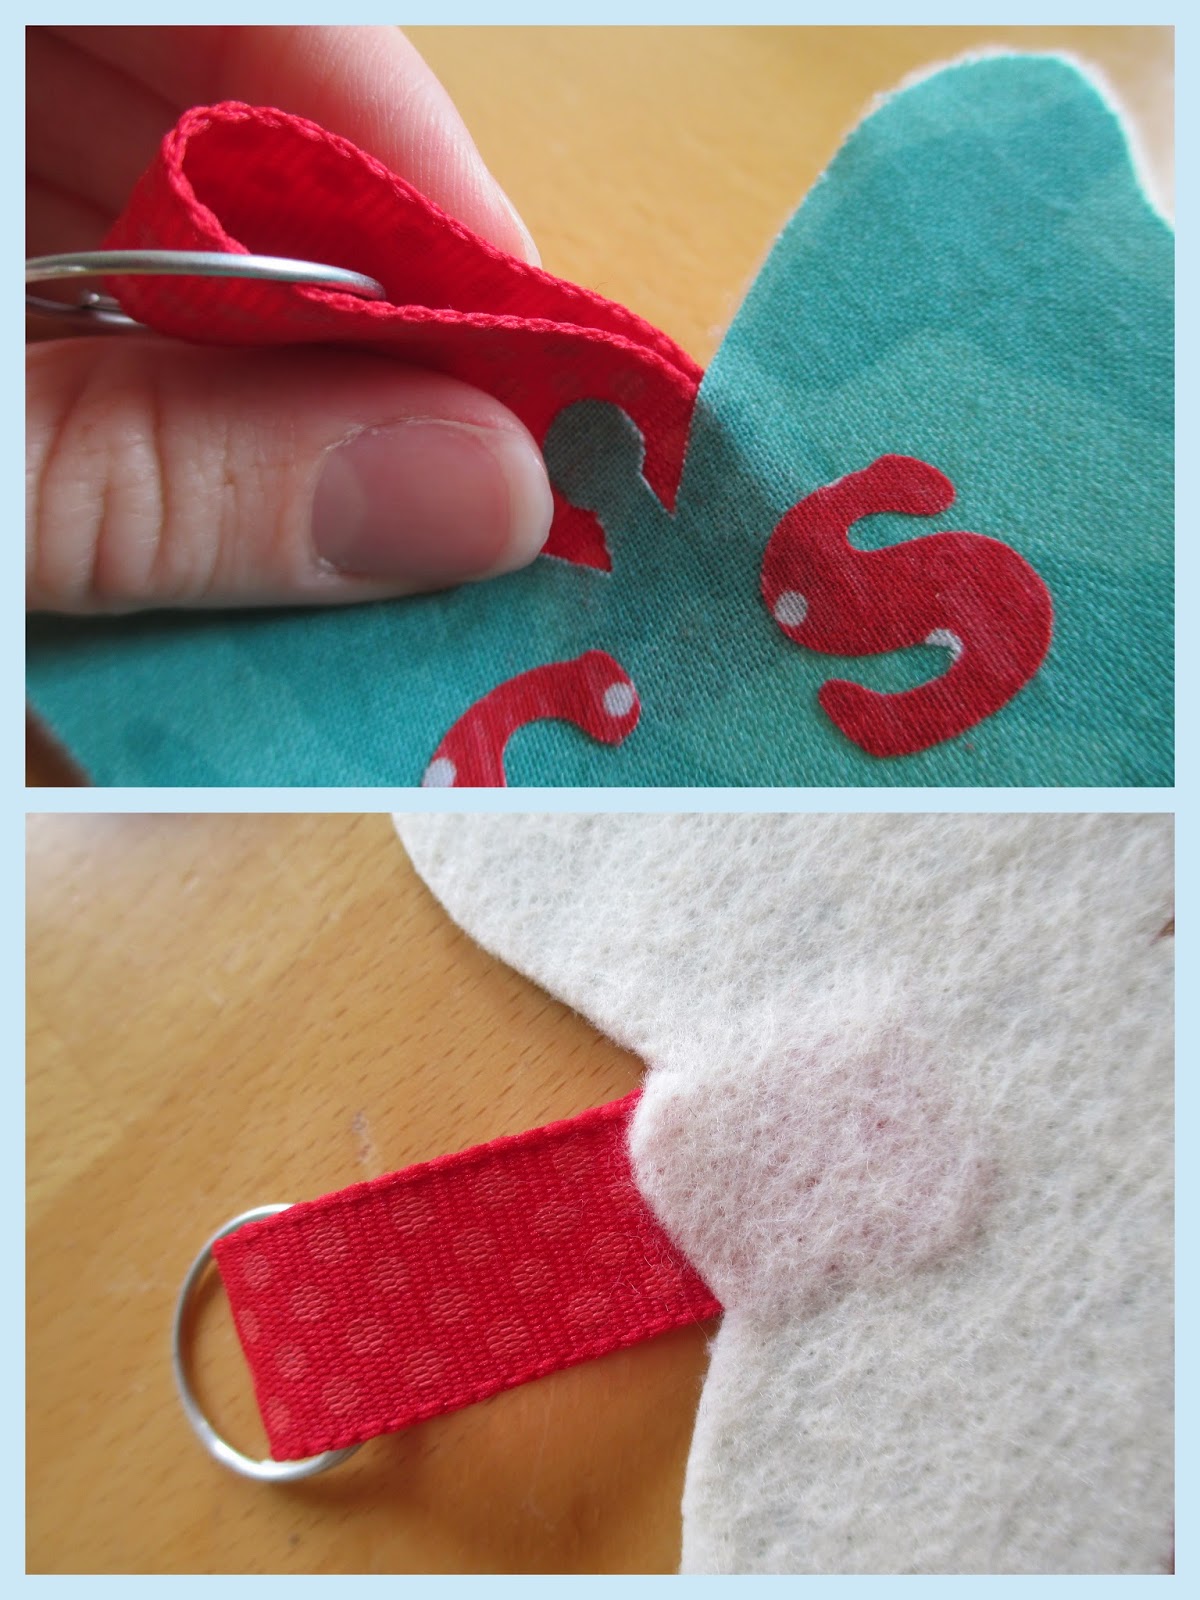
Because I wanted these to be key-chains or luggage tags, I wanted some type of ribbon to make them easier to attach to bags, etc.
Now, rather than just sew the ribbon onto the back, I decided to place the ends of it in-between my two pieces of fabric (front and backing pieces--i.e. the blue butterfly and the white felt) so that when I ironed the two together, the interfacing adhesive would sort of help bind the ribbon in between the two fabrics.
First I looped my ribbon through a keyring, then I folded the ribbon in half and put the ends between my two fabric pieces before ironing them together. Once they were ironed together, I used my handy-dandy fabric scissors ;) to cut off the excess fabric. You can see what I mean in the images below.
Once they were cut out, I did some (sloppy--whoops) hand stitching around the edges, or through the letters, to help keep everything more permanently in place, though, for light use, this may not really be necessary.

As you can see in the cat key-chain, I only stitched the letter on, and around the ears. This is because my niece really isn't likely to be tugging and ripping at this so hard that it'd need to be sewn around. But, you can certainly hand-stitch, or use your sewing machine to stitch these together more solidly.

(The letters are their initials.)

And there you have it! I now have only to get these mailed off to my nieces, and hope that their favorite animals don't change in the next week. (Because, as we all know, children so often do change their minds.) ;)

(And, in case you're wondering, Sarah already has hers with her on her way to Russia. :))
Excellent! Thanks for providing such a great article. You can also read our blog : custom key rings
ReplyDelete