 |
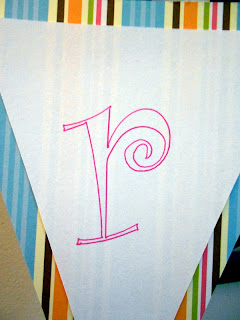
| Birthdays "r" for having fun and celebrating! |
First, using my Silhouette Cameo, I cut out the banner pieces using a banner I had in my library. If you don't yet have a banner, might I suggest this set of 6 banners that is currently quite popular on the Silhouette online store. There are also a plethora of other options. I just like that this comes with six for the price of one.
I was able to get a few border/backing pieces out of each 12x12 inch piece of paper that I had, with some to spare. I used four different papers, 3 patterned print papers and one bold solid color, for my design. Just ungroup the image once you have selected it in Silhouette Studio and then rotate and position the banner pieces to get as many on one page as needed or as you can with the sizing you'd like. Or, if you are going to change the sizing much and want to be sure they are uniform, delete all of the separate pieces but one, and once you get that last piece the size you want, duplicate it and use it as your pattern.
Note: Another fun idea would also be to use different print fabrics and your fabric blade to make a more lasting banner. Use your Silhouette to cut out the banner backings, as well as letters with whatever message you want to convey. I didn't have any fabric on hand for this quick surprise, however, so print paper it was!
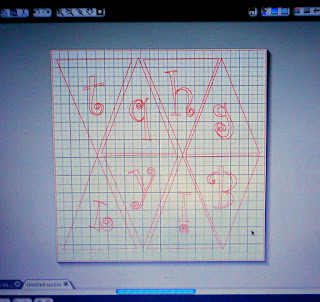
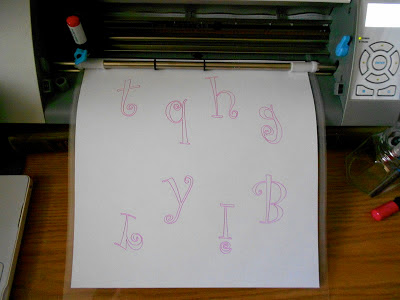
 Next, in order to get the smaller, inside white banner pieces to match perfectly with the outside backing, just a bit smaller, I just resized one of mine down to the size I wanted and then copied and pasted it into a new file on Silhouette Studio. There, I duplicated that inner piece to fit as many as I could on one page. I then quickly picked two fonts for my lettering, and positioned my letters appropriately in each of the inner banner pieces. I was careful to rotate my letters so that they were not going to be written upside down, but did forget to flip a few of them, so had to send those letters through on another sheet once I realized my mistake. :) The easiest way to do this is to right click on your word or letter and then click on Flip Horizontally and Flip Vertically, as needed. I then sent my Silhouette Sketch pens to work! To use the sketch pen, simply unclasp your cutting blade, and insert your sketch pen. I'm incidentally excited to get working more with some sketch images in the coming weeks. Stay tuned. :)
  |
| Be sure to rotate and flip letters as needed/as appropriate for your design. (In this example, I forgot to flip horizontally.) |
In order to just sketch the letters, and not the actual banner pieces that I'd be cutting, I just deleted the banner pieces once I had all of the letters positioned. After they went through, I loaded the same piece of paper, clicked the "undo" button until I had all of the white inner pieces back, and then deleted my letters. I reinserted the blade, and sent my design through to my Silhouette again. That is one way to draw something that you want cut out around after.


No comments:
Post a Comment