
(To learn about how to play Qwirkle, game rules, etc., click here. It is really quick and simple, and yet has won tons of awards. You can use this link to print out your own instructions for your homemade version as well.)
My Dad is also a big fan of new games, and I thought this would be a fun Christmas gift for him. Rather than put in the $25 or more to buy the game at the store (why are board games so expensive?!) I decided I'd rather put in some the time to make him his own personalized version of the game. While I was at it, I'd make one for my sister, Mom, and myself as well. Go big or go home, right? The game pieces themselves are simple enough, and all I needed was the following for one set:
Materials Needed
*108 1x1" square wooden tiles (I found alphabet tiles and just spray painted over them)
*6 different colors of vinyl, enough for 18 pieces for each color (the shapes will be smaller than 1x1" each)
*Black spray or craft paint
To make your set, spray or paint each wooden tile black. Allow to dry. Because there are so many tiles here, spray-painting them was a pretty easy route. Just know that if you buy colored wooden tiles, it will take more paint to spray over the colors uniformly, so you may touch-up with regular craft paint.
Next, pick and lay aside 6 different colors of vinyl. You can use whatever colors you like, but it is nice if they contrast. Bold and bright colors look nice against the black. See the original game for ideas.
Now, pick six different simple shapes that you have from different Cricut cartridges, or from your Silhouette library. You'll want to make them different enough from each other that you don't have to think about it much when you play. :) For my Dad's set, I picked simple images with a garden theme, such as a leaf, rake, flower, watering can, etc. He loves to garden. :) For my sister, I just chose some fun geometric shapes and whatever I came across first that didn't look too similar.
 |
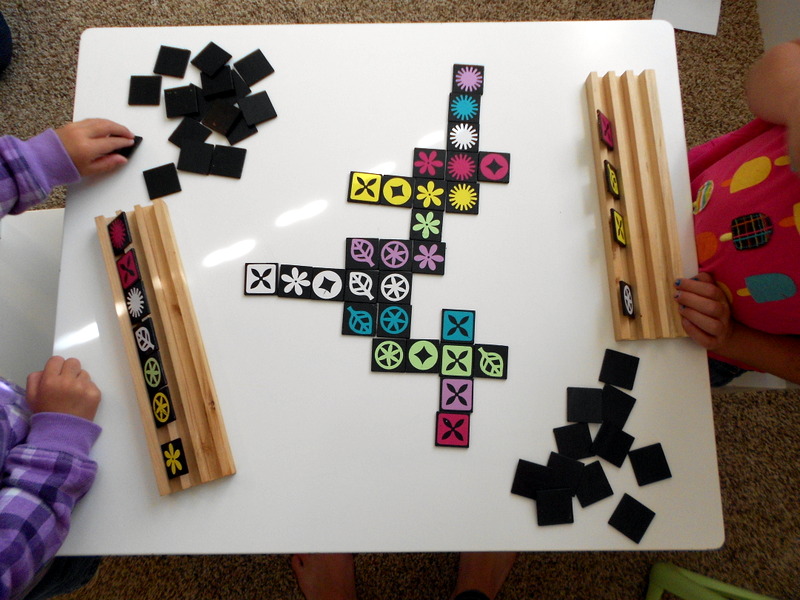
| Homemade Qwirkle Game |
Once you have your shapes, cut out three of each shape in each color vinyl. I.e. If you are using a leaf shape--cut out three leafs in red, three in purple, three in green, three in blue, etc. Do the same for each shape.
Obvious Note: The shapes need to be small enough to fit on your squares. :) I hope you figured that one out on your own, but if not...measure them before you cut. :) Practice cutting them on a piece of regular paper to be sure.
Next, use your transfer tape and scraper to apply the vinyl shapes to your now dried black squares. When you're done...you're done! Buy (or make) some tile holders from the store to help hide your pieces as you play. These are dominos holders. You can also just borrow your Scrabble tile holders. :) Throw all your pieces in a bag, and voila--new homemade game that the entire family can play. Even my 5 year old niece loves this game. Not to mention her mother. :) If you are feeling lazy, you can always buy the game here...but then what are you reading a DIY blog for? ;)
Enjoy!

Can you post link to alphabet tile you used?
ReplyDelete